Programming the DETI Robot in Windows Subsystem for Linux
Intro
Windows Subsystem for Linux (WSL) is an environment that allows Windows users to run a Linux Operating System from “inside Windows”. In this case, we will use it to program the DETI robot using the tools made by Prof. José Luís Azevedo and available on his homepage. We will see how to connect to the robot and how to navigate between Windows files (using Windows Explorer) and the Linux subsystem (required to compile and load the programs in the robot).
Setting up the system
To install and enable WSL, please refer to this post.
It it assumed that you have downloaded and installed the robot programming tools, following the instructions in the .tgz archive file.
Identifying the serial port
When using the DETI robot, your PC communicates with the robot using a USB cable. The robot controller board contains a device to handle the USB communication (FTDI232R) that, when connected to a PC, announces itself as a serial communication device 1. There may be many serial ports in a PC, so we should first discover which one is the robot connected to.
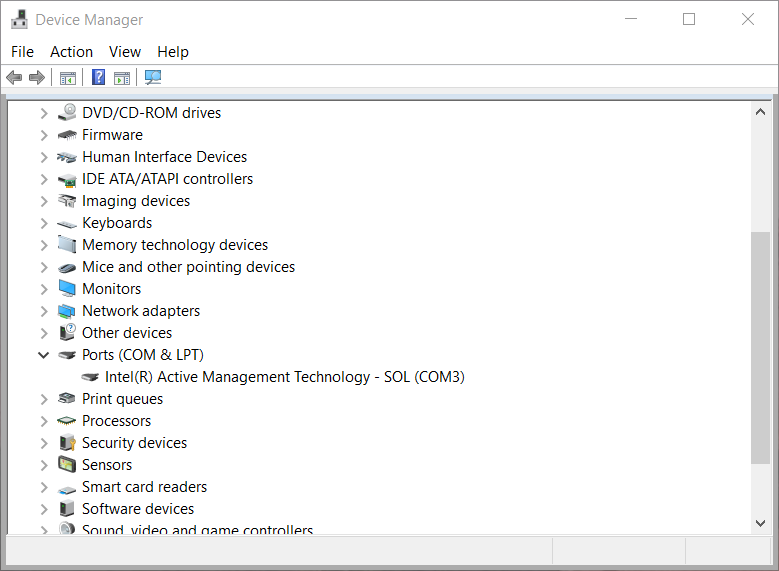
To do that, launch Windows Device Manager (press the Windows key and start typing “Device Manager”). After launching the Device Manager, you will see a list of all the devices on your PC; search for the line with “Ports (COM & LPT)” and click on the > sign next to it, to show the devices in this group. On my PC, this is what I get when the robot is not connected:

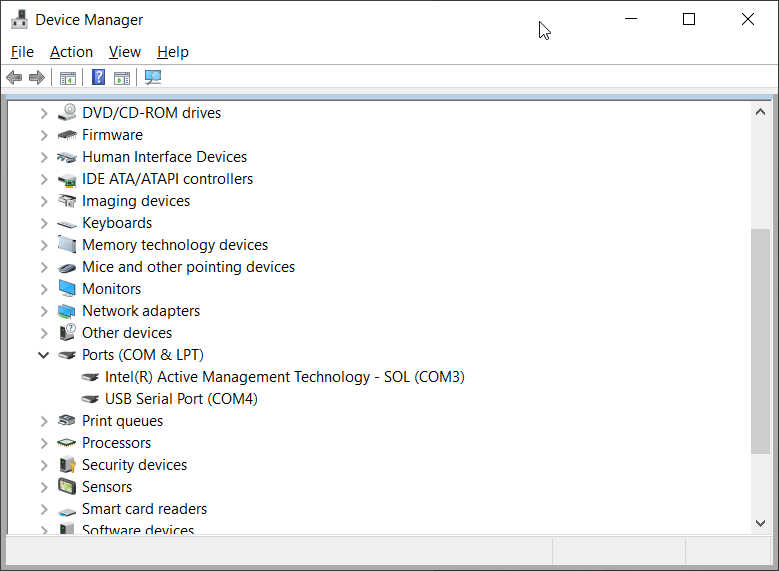
I just have one device, connected to COM32. After connecting the USB cable coming from the robot to the PC, I get:

A new device has appeared: an USB Serial Port, attached to COM4. Now, I know that the robot is connected to COM4 (serial port #4).
Opening a Linux terminal and programming the robot
Now, let us move into the folder containing the code and program the robot.
Open a Linux shell in the source files location
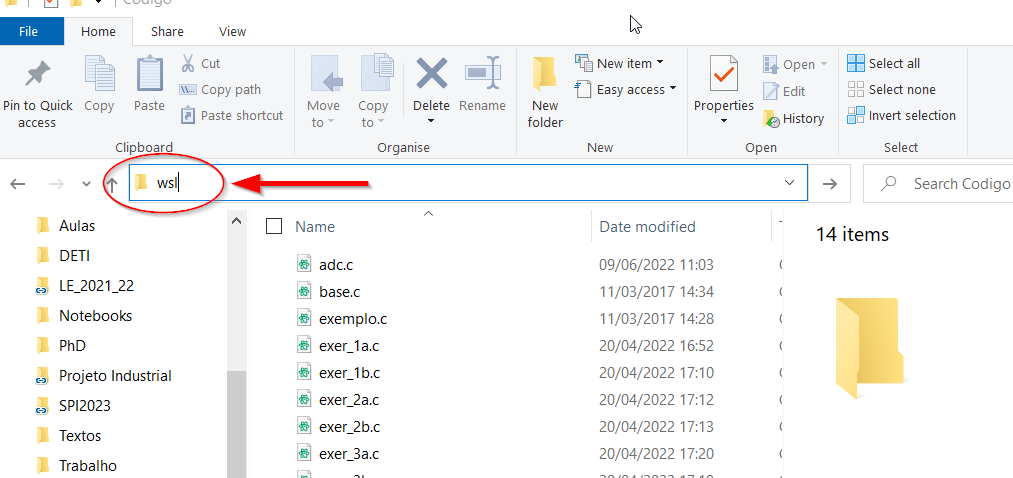
From within Windows Explorer, navigate to the folder containing the source code to program the robot. When in that folder, type Alt-D (or Ctrl-L) to access the location bar (the place on the top of the Explorer window where the location is displayed), and type wsl:

This will open a WSL command window in the current folder, where you can now launch the commands to compile and load the code.
Send the code to the robot
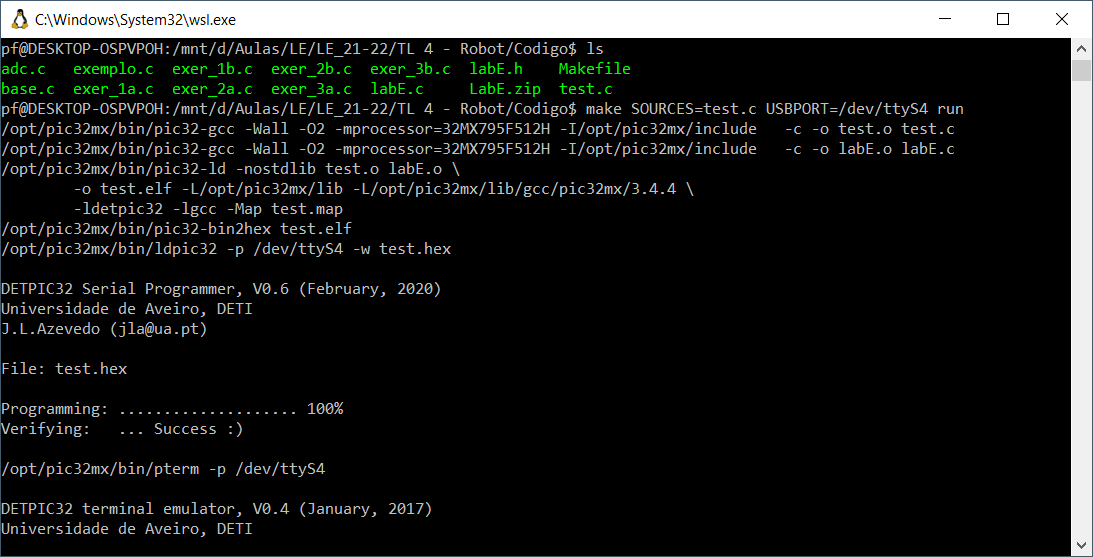
The next step is to compile, load and execute the code. In order to do that, I must communicate with the robot using the serial port discovered before (which I know that, in my case, sits in COM4). Serial ports appear in Unix3 as /dev/ttyS*n*, where *n* is the number of the port. So, on my PC, the serial port will be /dev/ttyS4. To tell the compiler tools that another serial port should be used, I must add the option USBPORT=/dev/ttyS4 for the Makefile to use /dev/ttyS4 instead of the standard /dev/ttyUSB0.
Issuing now the command in the WSL window (note that the $ is not to be typed!):
$ make SOURCES=test.c USBPORT=/dev/ttyS4 run
the program is compiled, loaded and launched in the robot.

Conclusion
We now have WSL capable of communicating with the robot, loading the programs, starting their execution and interacting using the terminal.
Final note
The Makefile distributed in the zip file contains a bug. Please use this one, instead.
-
This is because USB can serve to many things (it is the Universal Serial Bus), and every USB device must announce itself, letting the operating system know how to handle it. ↩
-
COMcorresponds to serial devices;LPTlists the parallel devices.LPTis a short for Line Printer, because Line Printers used to (and sometimes still do…) communicate with computers by means of parallel connections. ↩ -
Linux is Unix. ↩
Comments
Your comments are welcome. Feel free to leave here your remarks or your opinion!