Enabling Windows Subsystem for Linux
Intro
Windows Subsystem for Linux (WSL) is an environment that allows Windows users to run a Linux Operating System from “inside Windows”. This post shows how to enable WSL and install a Windows package containing one of the available Linux distributions. At the end, you should be able to run the Linux shell on your computer running Windows and have access to all the Linux features. You will then feel all the benefits of dealing with a proper and reliable operating system.
WSL allows also to launch Linux commands from Windows.
Enabling Windows Subsystem for Linux
WSL is a feature that needs to be activated before running Linux on you PC. For that purpose, there are two possible ways:
- using the command line
- using a graphical interface.
You can choose the one that fits you best.
Command line
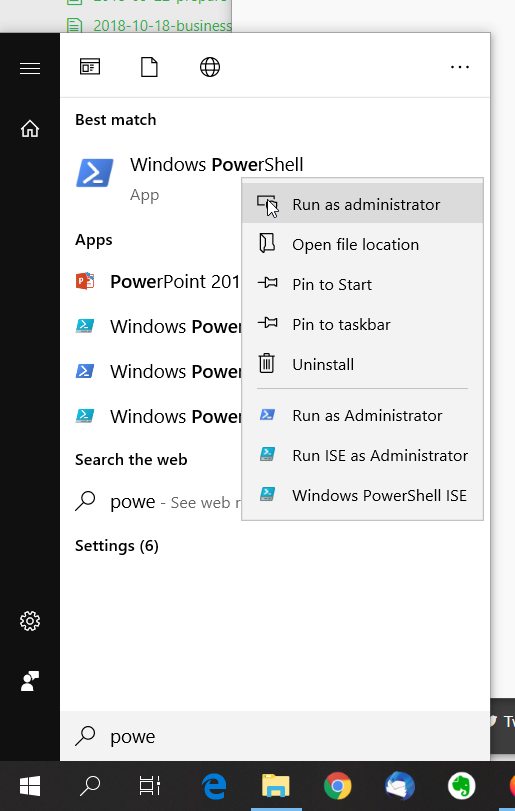
Open PowerShell as Administrator: press Windows key, type “Power” to make the fitting options appear, right-click on the “PowerShell” entry and select “Run as WSL_WindowsPowerShellAdmin”
In the Windows PowerShell, run the following command
Enable-WindowsOptionalFeature -Online -FeatureName Microsoft-Windows-Subsystem-Linux
You may need to reboot your machine after this step and before you can install the Linux environment (well, after all, you are running Windows, aren’t you?…)
Original info: https://docs.microsoft.com/en-us/windows/wsl/install-win10
Graphical interface
- Open the Settings App (Windows key and then type Settings; select the Settings App)
- Select Apps
- Select “Apps and Features”
- Scroll down all the apps list until you find “Related Settings / Programs and Features”
- Select “Turn Windows features on and off”
As before, you may need to reboot your machine.
Source: https://winaero.com/blog/enable-wsl-windows-10-fall-creators-update/
Installing the Linux distribution
After enabling WSL, you can go to the Microsoft Store and download one of the available Linux distros. Ubuntu distribution can be a wise choice. Note that not all distributions are free.
Comments
Your comments are welcome. Feel free to leave here your remarks or your opinion!